Now with more ways to pay.


Easy
Apple Pay is easy to use with the devices you use everyday – your iPhone, Apple Watch, iPad, and Mac.

Fast
With Apple Pay, there’s no delay, or looking for cards and wallets. There’s no touch-and-go, when you tap and pay.

Secure
Paying with Apple Pay is secure and private, as your card details are not stored on your device, or handed over at the point of sale.
Adding your card to Apple
iPhone
Open the wallet app, tap the “+” sign and follow the prompts.
Apple Watch
Open the Watch App on your iPhone and tap “Wallet & Apple Pay”. Then tap “Add Credit or Debit Card” and follow the prompts.
iPad or Mac
You can also set up Apple Pay on a MacBook or iPad
How to use Apple Pay
Paying in stores
Quickly pay in stores using your iPhone or Apple Watch.
Face ID
Double click on the side button, glance at your screen, then hold your iPhone near the reader.
Touch ID
Hold your iPhone near the reader with your finger on Touch ID.
Apple Watch
Double click the side button and hold your Apple Watch up to the reader.
Where to use Apple Pay
Apple Pay can be used almost anywhere you can tap and pay or see this symbol.
Paying online or in apps
Apple Pay is the easier, safer way to pay in stores, in selected apps and on participating websites with your iPhone, Apple Watch, iPad and Mac.
You can quickly check out using the devices you carry every day.
Apple Pay is also the safer and faster way to pay on participating websites and in selected apps because you no longer have to create an account or fill out lengthy forms.
Apple Pay FAQs
What is Apple Pay?
Apple Pay is a digital wallet from Apple which lets you use a compatible iPhone, Apple Watch or iPad to make secure contactless purchases in stores, within selected apps and participating websites, on your SmartCard eIM VISA debit card.
Apple Pay works with:
- iPhone SE (and later versions) in stores, within apps, and on the web
- iPad Pro, iPad Air 2, and iPad mini 3 (and later versions) within apps and on the web
- Apple Watch in stores and within apps
- Mac for payments on the web
See a full list of compatible Apple Pay devices here.
No, your card details are not stored on the device or in the Cloud. When a card is added to Apple Pay, a Device Account Number replaces the need for the card number.
The Device Account Number is used to make secure purchases in stores and within apps and websites. It will not work if it is compromised in any way and cannot be used outside of the device it is assigned to.
The Device Account Number can be found by opening the Wallet app, select a card and tap the (![]() ) Symbol, then scroll down to Device Account Number.
) Symbol, then scroll down to Device Account Number.
No, it does not cost anything to use Apple Pay.
The usual credit or debit charges apply to purchases and some retailers may apply a credit or debit card surcharge to purchases made using any payment method, contactless or chip and PIN transactions.
Apple Pay requires an active data plan or Wi-Fi connection to add your card to Apple Pay. Based upon your mobile plan and network, additional message and/or data charges may apply.
Getting started
To set up Apple Pay here’s what you need:
- Your eligible device and supported card
- The latest version of iOS, watchOS, or macOS
- An Apple ID signed in to iCloud
You do not need to download any additional app to use Apple Pay but the latest version of iOS and watchOS is required to set up cards in Apple Pay.
For more information on setting up Apple Pay, see Apples support page.
Add a card on your iPhone
- Go to Wallet and tap ‘
 ’ Follow the steps to add a new card.
 - Enter your card’s security code to add your credit or debit card affiliated with your iTunes Account. Or, select Add a different card and use your camera to enter the card information*
iPad
- Go to Settings
- Tap Wallet & Apple Pay and select Add Credit or Debit Card
- Enter your card’s security code to add your credit or debit card from your iTunes account. Or, select Add a different card and use your camera to enter the card information*
Apple Watch
- Open the Apple Watch app on your iPhone
- Tap Wallet & Apple Pay and select Add a Credit or Debit Card
- Enter your card’s security code to add your credit or debit card from your iTunes account. Or, select Add a different card and use your camera to enter the card information*
Card Verification
For security purposes, when a new card is added to Apple Pay we’ll ask you to complete a verification check before it can be used with Apple Pay. We’ll either:
- Send a one-time password to the mobile phone number you have registered with us.
- Ask you to call us on the displayed customer contact centre number and answer some security questions.
Yes, a card can be added to Apple Pay on multiple devices. Your card will need to be added to each device separately.
Yes, but it depends on the device model as to how many cards can be added to Apple Pay. You must be the owner of all cards you add.
Using Apple Pay
You can use Apple Pay wherever contactless payments are accepted or you see the contactless symbol:

Apple Pay is easy to use, and works with the Apple devices you use every day. You can make secure purchases in stores, within selected apps and on participating websites.
To pay with Face ID – double click the side button, glance at your screen, then hold the iPhone near the reader.
To pay with Touch ID – hold your iPhone near the reader and rest your finger on Touch ID.
To pay with device passcode – hold your iPhone near the reader and enter your device passcode.
With an Apple Watch you double-click the side button and hold the display up to the contactless reader to authorise a payment – whilst wearing the Apple Watch.
Please note: the Apple Watch NFC feature has to be activated before Apple Pay will work. When you strap your Apple Watch to your wrist you will be prompted to enter the device passcode. This will enable Apple Pay. If the Apple Watch is removed from your wrist, so skin contact is lost, Wrist Detect detects that skin contact has been lost and Apple Pay and the NFC feature are deactivated.
To pay in selected apps and on the web on your iPhone, iPad, Apple Watch, select Apple Pay at the check-out and complete the payment.
With Face ID glance at your screen, for Touch ID place your finger on Touch ID or you can enter the device passcode. For Apple Watch double-click on the side button.
Be sure to check your billing, shipping and contact information to make sure that they’re correct. If you want to pay with a different card, tap > next to your card.
To pay on the web on your Mac, select Apple Pay and complete the payment using either your iPhone or Apple Watch. On Mac models with Touch ID, pay using Touch ID.
Your Mac needs to be signed-in to the same iCloud account as the iPhone or Apple Watch and have Bluetooth enabled on your Mac.
At the check out
- Select the Buy with Apple Pay or Apple Pay button.
- Check your billing, shipping and contact information are correct:
– The default card can be changed by clicking the button next to the default card and selecting a new credit or debit card from any iPhone or Apple Watch which is nearby and signed into the same iCloud account. - When you are ready, make your purchase. With Face ID glance at your screen, for Touch ID place your finger on Touch ID or you can enter the device passcode. For Apple Watch double-click on the side button.
No. At this stage you can’t use Apply Pay to withdraw cash. You’ll need to continue to use your physical card to complete these transactions.
You can choose which eIM SmartCard you’d like to use as a default. See the ‘Managing your card in Apple Pay section’ of the FAQs for instructions on how to change your default card.
For more information on managing the cards you use on Apple Pay see Apples support page.
No. You don’t need an internet connect to use Apple Pay in stores.
No, there is no transaction limit when using Apple Pay. For transaction over $100 you might be asked to enter your card PIN on the retailer’s payment terminal. Your card issuer may impose daily limits to your overall card use including Apple pay transactions.
Apple Pay will work in all countries where contactless payments are accepted. We recommend you take your physical card as a backup, as not all merchants in all countries may support contactless payments. Eftpos cards would not work outside Australia.
You take the item(s) back to the retailer as normal. Some retailers will be able to offer refunds back to the device from which the original payment was made, while other may have to refund the physical card.
If the retailer is able to refund the device used to make the original purchase, you:
- Select the card you want to be refunded
- Hold the iPhone above or near the contactless reader and authorise the refund using Touch ID, Face ID or the device passcode; or
- Hold the Apple Watch display up to the contactless reader and double-click the side button to authorise the refund
You may need to provide the last four digits of your Device Account Number to the retailer. This can be found by opening the Wallet app on your iPhone, tap the card and tap the (![]() ) symbol and then scroll down to find Device Account Number.
) symbol and then scroll down to find Device Account Number.
Yes, you will be able to view the last 10 transactions made using Apple Pay on that device within the Wallet app.
Transactions will appear as they normally do on a bank or credit card statement. It is not possible to show if a transaction was made using Apple Pay, contactless card or chip and PIN.
Yes, Apple Pay is secure. A unique Device Account Number is securely stored on a chip in the device so payment can be made without any card information having to be shared with the retailer.
Other features which help to keep your payments secure and safe include:
iPhone and iPad
Payments can only be authorised by using Touch ID or Face ID (if enabled), or by entering the device passcode.
Apple Watch
Payments can only be authorised if the device passcode has been entered, you’re wearing your Apple Watch and skin contact with the device has not been lost. If the device is removed from your wrist, Wrist Detect deactivates the NFC feature and Apple Pay. To re-activate the NFC feature and Apple Pay the device passcode has to be entered again.
Please note you should never share your device passcode or register more than one person’s biometrics (fingerprint or face), while your card is registered to Apple Pay.
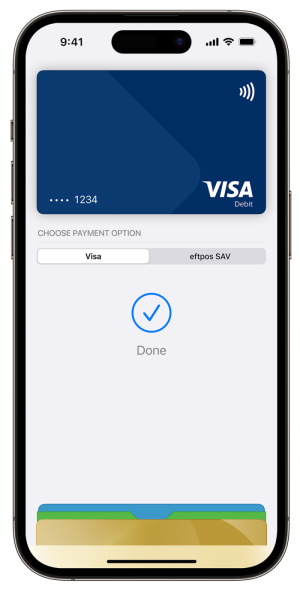
Using Apple Pay with eftpos
When you add your eligible debit card to Apple Pay, the card is set to Visa by default. You can change this to eftpos by following the steps below.
On your iPhone (not available on devices running iOS 18 or later)
- Open the Wallet app
- Tap your eligible debit card
- Tap Payment Option, then select eftpos SAV
On your Apple Watch (not available on devices running WatchOS 11 or later)
- Double-click the side button
- Select your eligible debit card
- Firmly press the display, then select eftpos SAV
If eftpos is not showing as an option
If you previously added your eligible debit card to Apple Pay and the eftpos option is not available, you will need to remove and re-add your card.
When re-adding, tap Add a Different Card at the bottom of the screen. Once completed, you will be able to select either Visa or eftpos.
Important information for iOS 18 / WatchOS 11 or later
For devices running iOS 18 / WatchOS 11 or later, the payment network (Visa or eftpos) is selected by the merchant (for example, a shop or business), not the cardholder.
Managing cards
The first card added to the Wallet app becomes the default card for that device. To change a default card, you must follow these steps:
iPhone
- Open the Wallet app
- Touch and hold your finger over the card you want to make the default card
- Drag the card to the front of the cards in the Apple Pay section
Apple Watch
- Open the Apple Watch app on your iPhone
- Go to the My Watch tab
- Tap Wallet & Apple Pay and then Default Card
- Choose a new card
iPad
- Go to Settings
- Tap Wallet & Apple Pay and then Default Card
- Choose a new card
For more information on managing the cards you use on Apple Pay see Apples support page.
To remove a card from Apple Pay you must follow these steps:
iPhone
- Open the Wallet app
- Select the relevant card and then tap (
 ) symbol to see all the card details
 - Scroll down and select Remove Card
Apple Watch
- Open the Apple Watch app on your iPhone
- Go to the My Watch tab
- Tap Wallet & Apple Pay and then Default Card
- Tap the card and then tap Remove Card
iPad
- Go to Settings
- Tap Wallet & Apple Pay and then Remove Card
- Choose the card to be removed from Apple Pay
Please note: if you remove your device passcode or Touch ID/Face ID security feature, or sign out of iCloud, all cards will be removed from Apple Pay on the device.
You should contact us straight away on SmartCard eIM hotline 1800 252 604 so the lost or stolen card can be cancelled, and no further purchases made. You can continue to use your phone to pay using Apple Pay until your replacement card turns up.
If you have the Find My iPhone app you can use it to remotely lock the device and disable the use of the Apple Pay function. Or you can log into iCloud.com to suspend or remove all cards from Apple Pay remotely. If you do not have the app you should contact us on SmartCard eIM hotline 1800 252 604 to request that your card be disabled for use with Apple Pay.
You should contact us on SmartCard eIM hotline 1800 252 604 to request that your card be disabled for use with Apple Pay. You should also go to iCloud.com to suspend or remove your card from Apple Watch. If you find your Apple Watch you can resume the card (if placed into suspended mode) via iCloud or you can add your card back by following the same steps you went through when you set the card up with Apple Pay originally.
Apple Pay Security
Apple Pay is very secure. You’re protected through your Apple device’s security settings (i.e. Face ID, Touch ID or your device passcode) on every transaction.
In addition, Indue as the issuer bank monitors your transactions to identify any unusual account activity. For further information on Apple Pay security, visit the Apple support page.
No. Your physical card number will not be shown to the merchant when making transactions.
Apple Pay works with iPhone SE and later in stores, apps and websites; with Apple Watch in stores and apps; with iPad Pro, iPad Air 2 and iPad mini 3 and later in apps and websites; and with Mac with an Apple Pay enabled iPhone 6 or later or Apple Watch. For a list of compatible Apple Pay devices, see: https://support.apple.com/en-au/HT208531.
Apple, the Apple logo, Apple Pay, Apple Watch, iPad, iPhone, Mac, Touch ID and Face ID are trademarks of Apple Inc., registered in the U.S. and other countries.

Shop securely
Google Pay protects your payment info with multiple layers of security. Using one of the world’s most advanced security infrastructures to help keep your information safe.

Shop in stores
Google Pay works almost anywhere contactless payments are accepted. Just unlock your phone and hold it near the terminal. You don’t even need to open the app.

Shop online
With Google Pay, you don’t have to remember all your card details or fill out endless forms on your phone. Just choose Google Pay as your payment method and pay with a few quick clicks instead.
Adding your card to Google Pay
Download the app from Google Play or check to see if it’s already installed on your phone.
Follow the instructions in the app.
You can pay with your Android phone almost anywhere. Easily pay almost anywhere contactless payments are accepted.
Google Pay FAQs
About Google Pay
Google Pay is a free app that allows you to use your compatible Android smart device to simply and securely pay in-store or via merchant’s apps. You’ll need an eligible card on your NFC-enabled Android device.
You can pay with your Android Phone at hundreds of thousands of merchants. Easily pay wherever contactless payments are accepted or where you see one of the contactless payments’ symbols.
You can also use Google Pay in many of your favourite apps. Just look for the Buy with Google Pay button. You can see the apps that accept Google Pay on the Google Play Store.
Your device must be NFC capable and running Android Lollipop 5.0 or above. Check your settings on your device or visit Google Pay .
To make in store payments your phone needs to support NFC. To check for NFC, look for it in your phone’s settings app. You can make in app payments even if your phone does not have HCE.
Getting Started
Simply check your device for the Google Pay app or download the app on the Google Play store.
- Follow the instructions to add a card or another payment method
- Verify your card
As many cards as you want, but you must be the owner of all cards loaded into the app.
Yes. You can add your card to multiple eligible devices. But it’ll require you to complete the registration process for each device.
To complete verification process, Indue sends a one-time password to your eIM registered mobile number. You need to call our Contact Centre in order to update your mobile number in our records.
Using Google Pay
When paying in-store:
- Simply wake up your phone. No need to open the app.
- Hold the back of your device near the contactless payment terminal and wait for the blue checkmark.
For purchases over $100, you may need to unlock your device and, depending on the terminal, you may need to enter your pin.
Simply select Google Pay at checkout. You can check the list of participating merchants in Australia on the Google Pay webpage.
No, not at this stage. Your plastic card will be required to withdraw cash.
It’ll be the first card you add. But you can choose your default card. Visit the Managing your Card in Google Pay section of the FAQs for instructions on how to change your default card.
It’ll work in countries where Visa contactless payments are accepted. We recommend that you take your physical card as a backup, as not all merchants allow contactless payments.
Yes. You can view the last 10 transactions made using your card registered for Google Pay.
Alternatively, you can login to the SmartCard eIM Mobile App or Internet Banking to view your full list of transactions.
In most instances, a return should work with Google Pay the same as it would if you had swiped a regular card.
The key difference is that instead of the merchant having to swipe your card again you’ll have to hold your phone near the payment terminal again to verify the return.
Be sure to check that the Card selected in Google Pay is the one that you used for the original purchase. In some cases you may also be asked for the last few digits of your Card number. If this happens, you should provide the last few digits of your virtual account number. To view the last four or five digits of the virtual account number go to “Card details” or “Transaction details.
Check with your retailer before making the return, as some merchants will require your physical card to process the refund.
No, you won’t. But you’ll only have a limited number of Google Pay purchases without an internet connection. You’ll therefore need to access a data network or Wi-Fi connection while overseas.
The number of offline purchases available will re-set once you have reconnected your device to the internet.
Managing your card in Google Pay
You can change your default card in two ways:
- On your device in the Google Pay app
- Via the Google accounts webpage.
For more information on selecting your default card, visit the Google Pay app or Google accounts webpage.
You can remove your card from your device in the Google Pay app or via the Google accounts webpage.
Visit the Google Pay app or Google accounts webpage for instructions on how to remove a card.
No. Your replacement Visa debit or credit card will automatically be updated with your Google Pay Virtual Account Number.
You can continue using Google Pay if you’re waiting to receive your new plastic card.
You will need to contact us on SmartCard eIM hotline 1800 252 604 immediately and we’ll cancel your card and order you a replacement. You can also do this via the internet banking for eIM participants or on the SmartCard eIM App. Your new card will automatically update itself in Google Pay, so there’s no need to register the card.
You can find, lock or erase Google Pay using Google’s Android Device Manger. Alternatively, you can call SmartCard eIM hotline 1800 252 604 and we can delete your Google Pay Virtual Account Number.
Remember that you can still use your plastic card.
So, you’ve got a new device? You’ll need to add your card again to Google Pay by following the same registration process. Remember to remove your card from Google Pay if you no longer intend to use the app or you sell your device.
Google Pay Security
Google Pay protects your payment info through multiple layers of security, using one of the world’s most advanced security infrastructures to help keep your information safe.
In addition, Indue as the issuer bank monitors your transaction history 24/7, to identify any unusual activity using a fraud management tool. You can contact Google directly about your device’s security features.
Your credit and debit card information are assigned a unique virtual account number that’s used at checkout, so your full card details are never shared with the store. Think of it as a digital stand-in for your payment information. To view the last four or five digits of your virtual account number go to “Card details” or “Transaction details”.
You’ll need your virtual account number if you would like to make a return on an item purchased with Google Pay.
Pay with Samsung Pay almost anywhere^ you can tap or swipe your card.
Simple to use
With a simple and intuitive user interface, payments can be made in a matter of seconds. Activate Samsung Pay by swiping up from the bottom of your device screen and then select your card before authorising payment.
Designed to be secure
Your payment information is protected using several layers of security. Firstly, your card details are not stored on your device and then, when you pay, every transaction is authorised by your fingerprint or PIN.
More than just payments
Slim down your wallet by adding your favourite loyalty cards to Samsung Pay and access them whenever, wherever. Simply scan the digital barcode at the checkout to capture your loyalty points.
Getting started is simple – follow these 4 steps
Open the Samsung Pay app and sign in using your Samsung Account ID
Register your fingerprint and passcode which you will use to authorise payments.
Load your Card onto Samsung Pay, by scanning the card or entering the details manually
Verify your card with a one-time passcode and then you are all set to go!
Samsung Pay FAQs
Overview
Samsung Pay is a secure and easy-to-use mobile payment service which is designed to make purchases almost everywhere.
It enables the use of credit cards from participating financial institutions and loyalty cards from participating merchants. To help make mobile payments and scanning loyalty cards more accessible to merchants and customers, Samsung has included Near Field Communication (NFC)*, Magnetic Secure Transmission (MST)†, and MoBeam technologies.
Samsung Pay enables users to make in-store contactless payments using a compatible Samsung device. Samsung Pay’s main feature is its NFC payments capability.
Samsung Pay uses Near Field Communication (NFC) to make contactless mobile payments. NFC helps enable compatible Samsung devices* to make secure transactions.
Visit www.samsung.com/au/apps/samsungpay/#compatibility for full list of eligible devices. Samsung.
† Gear S2, Galaxy S6, Galaxy S6 edge will only support NFC technology for transactions with Samsung Pay.
Due to Samsung’s advance proprietary technology Magnetic Secure Transaction (MST), Samsung Pay can be used almost everywhere around the globe. Please check your card issuer’s policies for transactions in foreign countries. If you can use your physical card in the country you are travelling to, you should be able to use Samsung Pay to make a payment.
Samsung Pay offers a simple and convenient payment experience that doesn’t require searching through your wallet or purse. Additionally, Samsung Pay adds a level of security to your payment information that physical cards don’t have. Your credit or debit card number will never be saved on your device. When you make a payment with Samsung Pay, only a token and a cryptogram that is only valid for that particular payment are transmitted to the card reader.
Samsung Pay is compatible with a number of Australian Banks. For the full list please click here. You can register to receive an update when additional compatible networks and banks become available to Samsung Pay at the link provided.
Basics
- From the Home screen, touch Apps.
- Touch Samsung Pay.
- Touch INSTALL to download the necessary files.
- If there are updates to the built-in application, touch INSTALL.
- Touch OPEN to start using Samsung Pay.
- From the Home screen, touch Apps.
- Touch Samsung Pay.
- Touch ADD or, if this is the first payment card being added, touch Add a credit card or debit card.
- Align your card inside the frame to automatically detect the card number and expiration date.
Note: Touch Enter card manually if your device cannot detect the card information. - Please verify the information captured by the camera.
- Enter the remaining information and touch NEXT.
- Review the terms and conditions, and then touch AGREE TO ALL.
- If necessary, select a method to authenticate your identity using a one-time password (OTP) or by calling the bank.
- Enter the OTP and touch SUBMIT.
- Enter your signature like you would sign on the back of your card and touch SAVE.
Note: If you are unsatisfied with your signature, touch Retry to sign again. - Touch DONE to complete the process.
- After your card is added to Samsung Pay, it will be verified by the payment card network (i.e., Visa, MasterCard, or American Express) and the card issuer. On average, verification will take approximately 5 to 10 minutes. During that time, you will be unable to use your card in Samsung Pay.
Note: You can continue to add cards while others are being verified. - After the card is verified, it can be used immediately to make a purchase
- From the Home screen, touch Apps.
- Touch Samsung Pay.
- The first time you open Samsung Pay, a short introduction video will play.
Note: Touch SKIP to bypass the introduction and continue the setup process. - Your Samsung account will be automatically linked to Samsung Pay. Touch START to continue.
Note: If you have yet to sign in to your Samsung account, touch SIGN IN and enter your email address and password information. If you do not have an account, you can create a Samsung account on your device. - Touch USE FINGERPRINT to assign your fingerprint as the verification method. If you have not registered your fingerprint on the device, you will be given the chance to add a fingerprint. It will walk you through adding a fingerprint for the first time.
Note: You can also assign a four-digit Samsung Pay PIN code instead of using your fingerprint. Touch Skip and use Samsung Pay PIN.
Here is how to set up the fingerprint - If you have a secure lock on your device other than a fingerprint, enter the password, PIN, or pattern.
- Place your finger on the Home key, and then lift it off once you feel a vibration. Repeat until you have reached 100%. To ensure your whole fingerprint is recorded, move your finger slightly each time you touch the key, fully covering the key with your finger.
- Scan the fingerprint you just registered for verification.
- Create a Samsung Pay PIN for payment authentication and application protection.
- Re-enter the PIN to confirm.
- You are now ready to add your payment cards and use Samsung Pay.
- Initiate Samsung Pay by either swiping-up from the home button or opening the Samsung Pay app from the home screen.
- Select the card you want to pay with by swiping left or right.
- Verify your fingerprint and touch your phone to either the card reader or NFC reader to complete the transaction. Alternatively, enter your 4-digit Samsung Pay PIN if you have chosen not to use the fingerprint feature. Please note that you must wait until the verification is over before touching your phone to the reader or an error might occur.
Samsung Pay is accepted where Visa, Mastercard and American Express and eftpos are accepted.
Yes. Samsung Pay for in-app and online payment is available for select apps and online checkouts.
Cancelling a payment made with Samsung Pay is the same as a physical card. The exact process will depend on the policies of your card issuer and the merchant you made the purchase from.
All purchases made with Samsung Pay can be returned according to the store’s policies. If you return an item paid for with Samsung Pay, the store may require you to tap your phone onto either the card reader or the NFC reader to complete the return.
Samsung Pay requires an active internet connection for card registration and activation. However, an active internet connection is not required to make in-store purchases. Ideally, the device should connect to the internet once per day to ensure that Samsung Pay stays up to date. Cards should allow you to make up to 10 transactions before you will need to connect to the internet and refresh the Samsung Pay token.
Up to 10 of your latest transactions1 made with Samsung Pay can be viewed in the Samsung Pay app for one month from the time of purchase. Simply tap on a registered card in the app to see all the Samsung Pay transactions made with that card2.
Additionally, a real-time3 push notifications with transaction details can be sent after each Samsung Pay purchase.
1 Some cards will only display the last 10 transactions
2 Transaction information is not provided for all cards
3 Real-time push notifications require an active internet connection.
No. Displaying transaction history is not available for all card types or card issuers. Samsung Pay may not show your transaction history depending on the policies set by your card issuer.
In these cases, you can open your card issuer’s app from the Samsung Pay interface if you have the app installed on your device; or visit your card issuer’s website or login into your online banking portal to view transaction information.
No. The card displayed in Samsung Pay may not always exactly match the physical card.
The key points to look for are:
- The Card Issuer
- The Card Network
- The last four digits of the physical card.
Subject to the answer above, the payment cards on Samsung Pay are designed to be digital versions of your physical payment cards. If you lose your original payment card and then receive a replacement card, you do not need to remove the original payment card from Samsung Pay and register the replacement card.
Yes. When you disable Samsung Pay or remove a registered card, you are only suspending the token, or digital card number, that has been assigned to your device for that card. If you wish to suspend you physical card, please contact your card issuer for assistance.
There is not a “default” card in Samsung Pay. When you open the app or activate the Simple Pay feature by swiping up from the Home Key on supported screens, the first card displayed is either the last card you registered or the last card you viewed or used.
The “retry” button appears when the countdown timer has reached its end and the device has not detected an NFC payment or has not received a notification of a successful payment.
The “retry” button allows you to begin the payment process, one additional time, without reauthorizing using your fingerprint or PIN.
Note: When an NFC transaction is completed, the retry button will not be shown. Additionally, if a payment success notification is received, the retry button will not be shown.
In rare cases, the merchant may ask you for the last four digits of the card number.
You will need to provide the last four digits of the digital card number, instead of the last four digits of the physical card. For ease of use, it is located on the left side of the card in the Simple Pay screen, and in the main app when viewing your registered cards.
You can use Samsung Pay at eligible ANZ ATM’s.
To use Samsung Pay, you need:
- A compatible Samsung device1
- A supported payment card from a participating bank
- A Samsung account
- Registered fingerprint or Samsung Pay PIN
- To be located in the country of the participating bank2
1If compatible, newer devices will have Samsung Pay preloaded
2For the verification purposes, you must be located in the same country of the participating bank when adding a payment card in Samsung Pay
Card Registration
Cards can be either registered by scanning your physical card while in the Samsung Pay app or manually inputting the card information. Then, depending on the policies set by your bank, Samsung Pay will prompt you to verify your identity through a text message, or a phone call.
You can register up to 10 payment cards in Samsung Pay.
Yes. The total number of devices you can register a card may vary, as determined by your card issuer. Contact your card issuer for more details on the number of devices you can register your card on.
The average amount of time between the request for activation and approval may be within minutes but can take up to 10 minutes after any additional verification requirements have been met. If this amount of time has been exceeded, remove the card from Samsung Pay and register it again. Contact your card issuer for assistance if you continue to encounter delays.
We suggest contacting the card issuer for further information. Not all card types are eligible to use with Samsung Pay.
Additionally, there may be other items required prior registering a card with the Samsung Pay service. Only your card issuer will have these details.
Open Samsung Pay, select your card, then select eftpos. If eftpos isn’t coming up as an option, you’ll need to remove your card and re-add it. Here’s what to do:
- Open Samsung Pay
- Tap Menu, then tap ‘Cards’
- Select the card you want to remove and tap ‘Delete Card’
- Enter your Samsung Pay PIN
- Tap ‘Add Card’ and follow the prompts.
- Once you’ve re-added your card, the eftpos network will be available and you can pick eftpos from the Payment Methods.
Yes. However, for the best experience, the device should have a SIM card installed. If you encounter any issues when registering the card over Wi-Fi, we suggest switching to a mobile data connection.
No.
Privacy
In order to verify your identity, Samsung Pay may access location information obtained from your device when you register your payment card, but only if ‘Location’ is turned on in your device settings. Samsung Pay will not be able to access your location information if you have turned ‘Location’ off in your device settings.